如果想删除编译安装的软件:
    1,清空PATH
    2,删除文件夹即可
yum install gcc patch libffi-devel python-devel zlib-devel bzip2-devel openssl-devel ncurses-devel sqlite-devel readline-devel tk-devel gdbm-devel db4-devel libpcap-devel xz-devel openssl openssl-devel -y
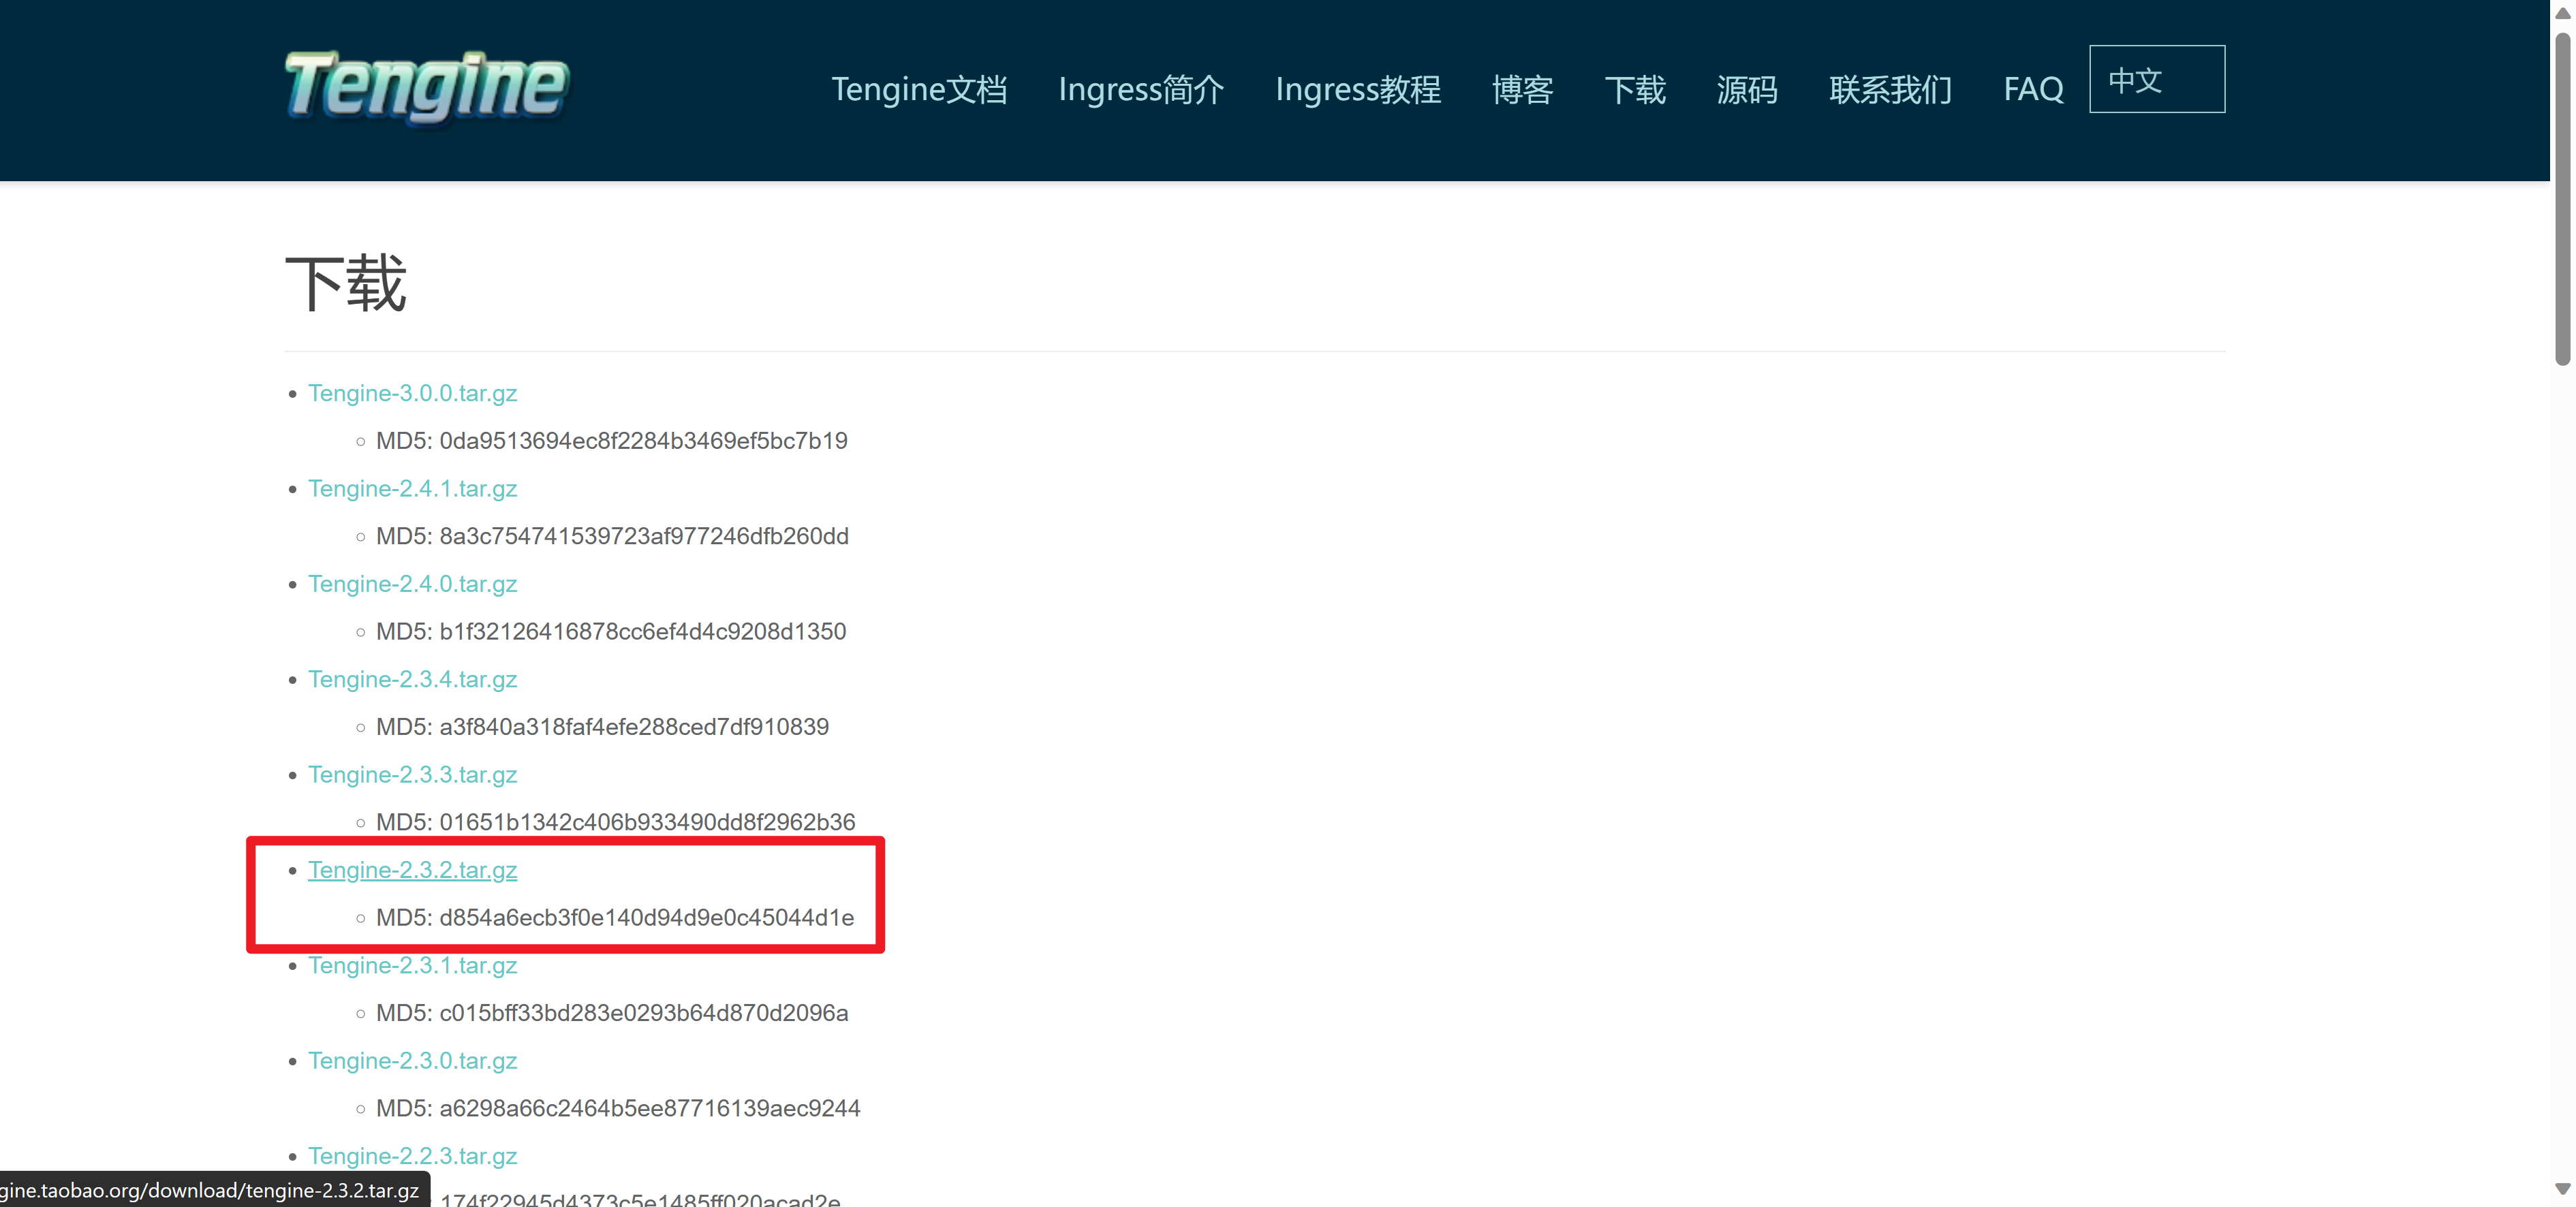
# 在以下网站中选择对应的版本http地址
http://tengine.taobao.org/index_cn.html

cd /opt/
[root@localhost opt]# wget http://tengine.taobao.org/download/tengine-2.3.2.tar.gz
[root@localhost opt]# tar -zxvf tengine-2.3.2.tar.gz
[root@localhost opt]# cd tengine-2.3.2/
[root@localhost tengine-2.3.2]# ./configure --prefix=/opt/tngx232/
[root@localhost tengine-2.3.2]# make && make install
[root@localhost tngx232]# ls
conf  html  logs  sbin

conf  明显是存放*.conf配置文件的
html  存放网页的静态文件的目录
logs  日志
sbin  存放nginx的可执行命令
# 永久修改PATH,开机就去读
vim /etc/profile
# 写入
PATH="/opt/tngx232/sbin:/opt/python369/bin:/usr/local/sbin:/usr/local/bin:/usr/sbin:/usr/bin:"
source /etc/profile

# 检查环境变量是否添加成功
[root@localhost tngx232]# which nginx
/opt/tngx232/sbin/nginx
# 直接输入nginx命令即可启动
# 有关nginx的命令

nginx            # 首次输入是直接启动,不得再次输入
nginx -s reload  # 平滑重启,重新读取nginx的配置文件,而不重启进程
nginx -s stop    # 停止nginx进程
nginx -t         # 检测nginx.conf语法是否正确

# 查询nginx服务启动状态
[root@localhost tngx232]# netstat -tunlp | grep 80
tcp        0      0 0.0.0.0:80              0.0.0.0:*               LISTEN      106052/nginx: maste
[root@localhost tngx232]#
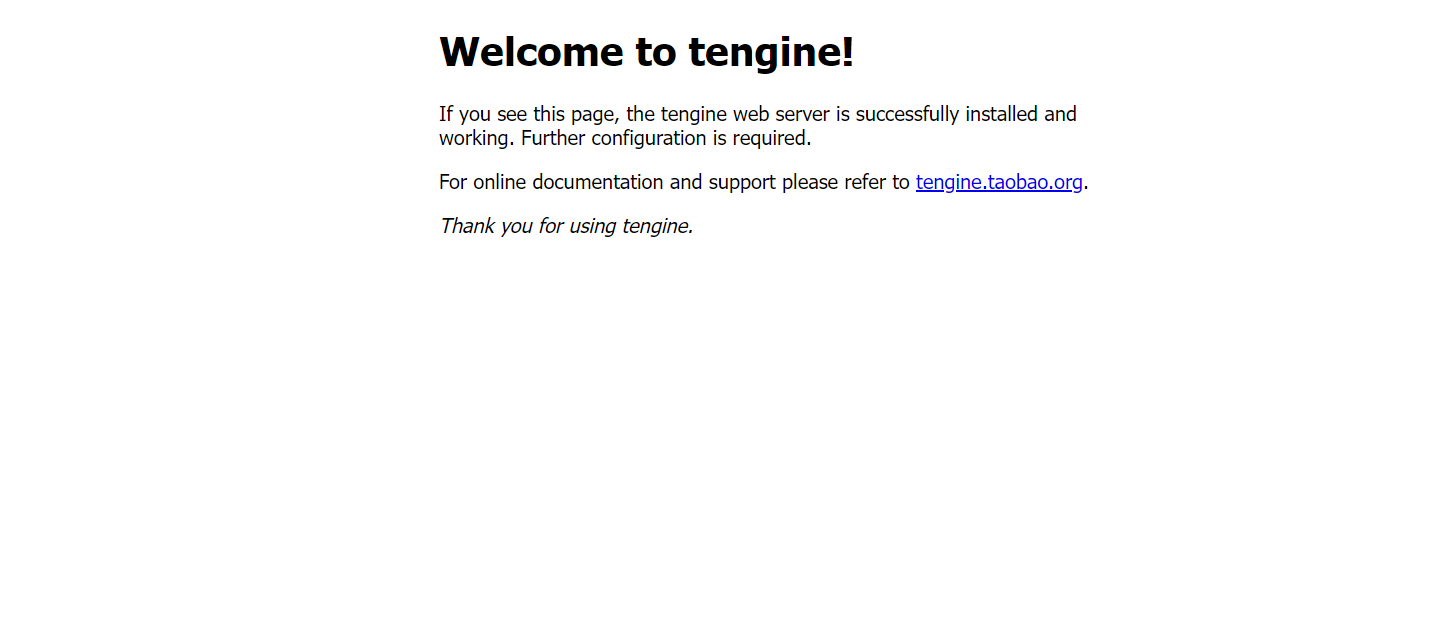
10.0.0.129:80 # 完整版 http://10.0.0.129/index.html
nginx的配置文件是c语言的代码风格
以 ; 号表示每一行配置的结束
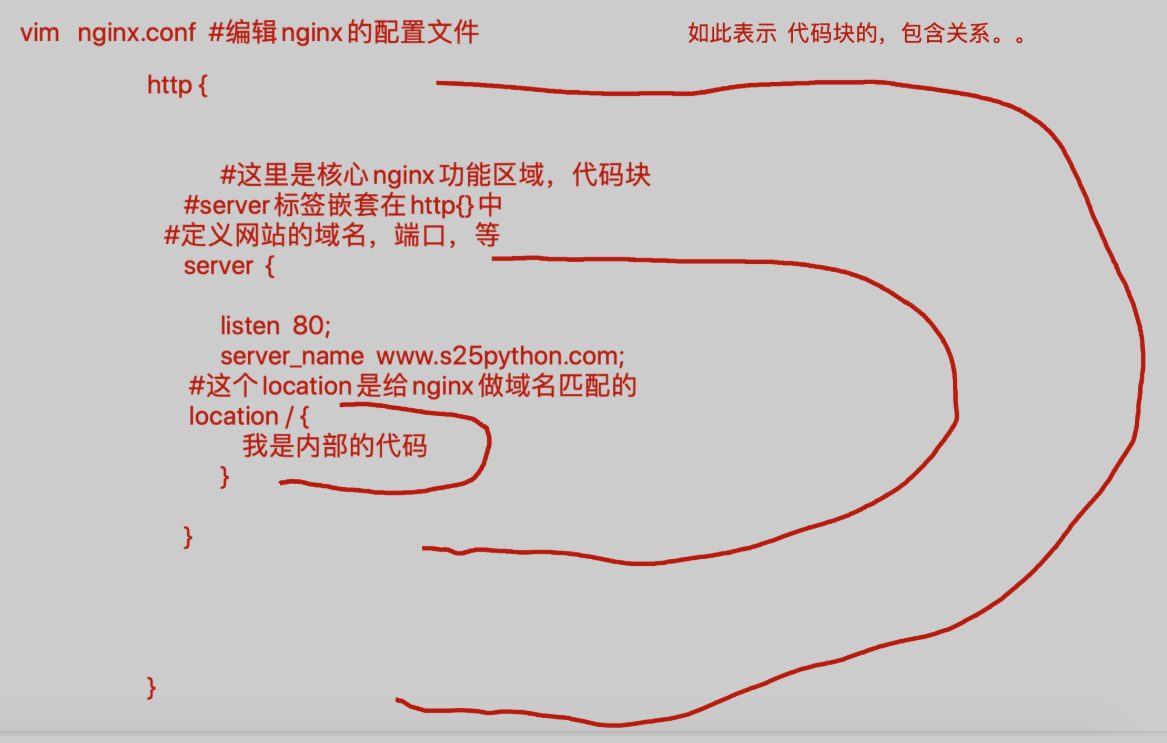
nginx.conf 中是以代码块形式编写的,例如主要的几个代码块
http{ } # 里面定义了多个代码,是nginx的核心功能配置点
server{ } # 虚拟主机代码块,定义了网站的目录地址,以及首页文件名字,监听的端口,等等功能
location { } # 域名匹配代码块。。
# 比喻代码块的含义
def hello(): # python
我是缩进,被hello这个函数控制
我们都是缩进内的代码块
func hello(){ # go
我们都是在花括号内的代码
我们是各改代码块
}
[root@localhost ~]# cd /opt/tngx232/conf

[root@localhost conf]# vim nginx.conf
#user  nobody;
#  定义nginx的工作进程数,以cpu核数为准
worker_processes  5;

# 想用哪个用能,直接打开注释,或者写进来即可
error_log  logs/error.log;
#error_log  logs/error.log  notice;
#error_log  logs/error.log  info;
#error_log  "pipe:rollback logs/error_log interval=1d baknum=7 maxsize=2G";

# pid文件的作用是,pid是用于启停进程的号码
# 原本需要自己 ps -ef 去获取nginx的进程id
# 打开注释,可以自动把 pid 写入到此 nginx.pid文件中,
pid        logs/nginx.pid;

events {
    worker_connections  1024;
}

# 这个http区域,是nginx的核心功能区域
http {
    include       mime.types;
    default_type  application/octet-stream;
    # 打开此nginx的访问日志功能,即可查看日志
    log_format  main  '$remote_addr - $remote_user [$time_local] "$request" '
                      '$status $body_bytes_sent "$http_referer" '
                      '"$http_user_agent" "$http_x_forwarded_for"';

    access_log  logs/access.log  main;

    sendfile        on;
    #tcp_nopush     on;

    #keepalive_timeout  0;
    keepalive_timeout  65;

    # nginx开启静态资源压缩,比如nginx返回磁盘的html文件特别大,里面包含了诸多的jss、css、图片引用
    # 一个html文件达到4m大小
    # 传输图片等等都是高清的1080p图片
    # 打开此功能,能够极大的提升网站访问,以及静态资源压缩
    gzip  on;

    # 提供静态资源缓存功能,第一次访问过网页之后,nginx能够让图片、js等静态资源,缓存到浏览器上
    # 浏览器下次访问网站,速度就几乎是秒开了
    # 想要用这些功能,只需要在nginx里打开某些配置即可,作者都已经写好了该功能
    # 这里的server区域配置,就是虚拟主机的核心配置
    # nginx支持编写多个server{} 区域块,以达到多虚拟主机,多个站点的功能
    # server{} 区域块,可以存在多个,且默认是自上而下去加载,去匹配的
    # 目前这里是第一个server {} 区域块,端口是85
    server {
        # 定义该网站的端口
        listen       85;
        #填写域名,没有就默认即可
        server_name  localhost;
        #更改nginx的编码支持
        charset utf-8;

        # 如此添加一行参数,当用户请求出错,出现404的时候,就返回 root定义的目录去寻找40x.html文件
        # 讲师机器的配置,也就是去  /s25python/ 这个目录下 寻找 40x.html
        error_page  404  /40x.html;

        #access_log  logs/host.access.log  main;
        #access_log  "pipe:rollback logs/host.access_log interval=1d baknum=7 maxsize=2G"  main;
        # nginx的域名匹配,所有的请求,都会进入到这里
        # 例如  10.0.0.129:85/lubenwei.jpg
        #       10.0.0.129:85/menggededianhua.txt
        location / {
            # 这个root参数,是定义该虚拟主机资料存放路径的,可以自由修改
            # 当用户访问  10.0.0.129:85的时候,就返回该目录的资料
            root   /s25python/;
            # index参数,用于定义nginx的首页文件名字  ,只要在/s25nginx目录下存在index.html文件即可
            index  index.html index.htm;
        }

    }

    # 这里就是上一个Server{}的标签闭合处了,可以写入第二个server{}
    # 注意 ,注意,server{} 标签快,是平级的关系,不得嵌套,检查花括号
    # 这里是第二个虚拟主机的配置了
    server  {
    listen 89;
    server_name  _;
    # nginx的域名匹配
    # 当用户访问 10.0.0.129:89的时候,返回该目录的内容
        location  / {
                root   /s25linux/;
                index  index.html;
        }
    }
}
#user  nobody;
worker_processes  5;

error_log  logs/error.log;
#error_log  logs/error.log  notice;
#error_log  logs/error.log  info;
#error_log  "pipe:rollback logs/error_log interval=1d baknum=7 maxsize=2G";

pid        logs/nginx.pid;

events {
    worker_connections  1024;
}

http {
    include       mime.types;
    default_type  application/octet-stream;

    log_format  main  '$remote_addr - $remote_user [$time_local] "$request" '
                      '$status $body_bytes_sent "$http_referer" '
                      '"$http_user_agent" "$http_x_forwarded_for"';

    access_log  logs/access.log  main;

    sendfile        on;
    #tcp_nopush     on;

    #keepalive_timeout  0;
    keepalive_timeout  65;

    gzip  on;

    server {
        listen       85;
        server_name  localhost;
        charset utf-8;

        error_page  404  /40x.html;

        location / {
            root   /s25python/;
            index  index.html index.htm;
        }

    }

    server  {
    listen 89;
    server_name  _;

        location  / {
                root   /s25linux/;
                index  index.html;
        }
    }
}
[root@localhost conf]# nginx -t  # 检测nginx.conf语法是否正确
nginx: the configuration file /opt/tngx232//conf/nginx.conf syntax is ok
nginx: configuration file /opt/tngx232//conf/nginx.conf test is successful
[root@localhost conf]# nginx -s reload  # 平滑重启,重新读取nginx参数
# 浏览器访问 10.0.0.129:85/index.html # 注意端口号
[root@localhost conf]# mkdir /s25python
[root@localhost conf]# echo "i like python,so you?" > /s25python/index.html
# 浏览器再次访问 10.0.0.129:85/index.html

也称之为是 nginx 的虚拟主机站点配置
指的就是在nginx中,能够通过文件目录的不同,可以定义多个不同的网站
# 1.如何修改nginx的首页地址,进入html目录下,找到index.html文件,默认读取的是这个文件
[root@localhost html]# pwd
/opt/tngx232/html
[root@localhost html]# ls
index.html
[root@localhost html]# vim index.html
<meta charset=utf8>
<p>welcome to index</p>
# 浏览器访问 10.0.0.129/index.html 查看效果

# 2.在自己的站点下,存放一些静态资料,如gif,jpg等
[root@localhost html]# ls
55kai.jpg  index.html  test.html
# 浏览器访问 10.0.0.129/55kai.jpg 查看效果
# 浏览器访问 10.0.0.129/test.html 查看效果
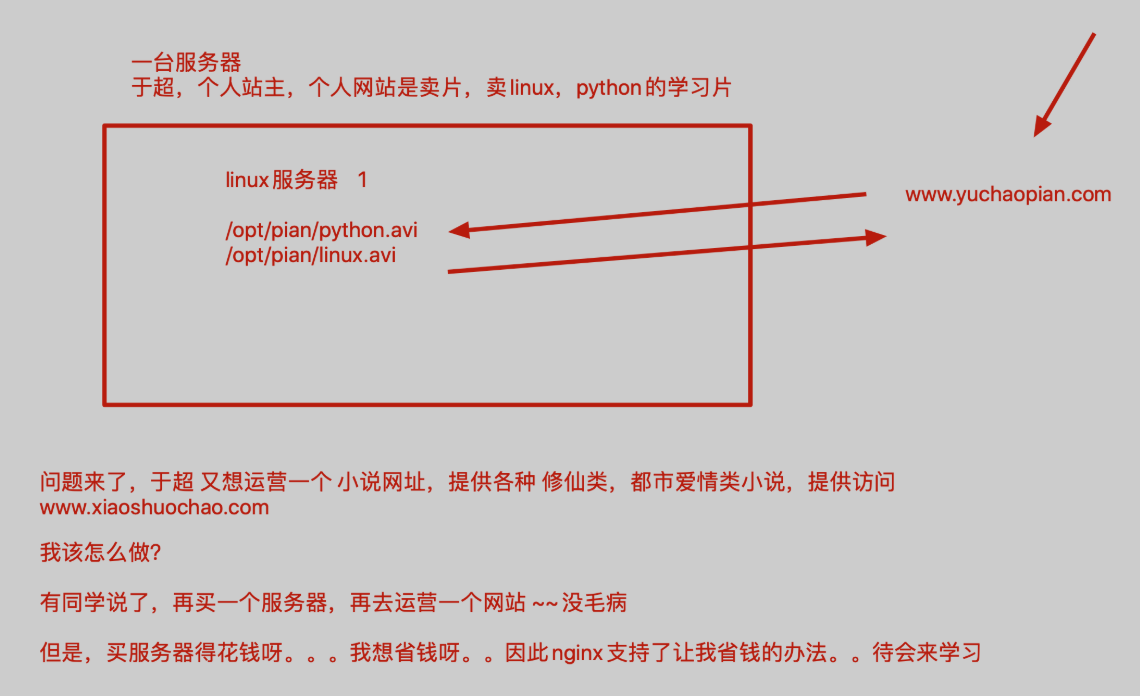
虚拟主机就是将一台服务器分割成多个“虚拟服务器”,每个站点使用各自的硬盘空间,由于省资源、省钱,众多网站都使用虚拟主机来部署网站。
虚拟主机的概念就是在web服务里的一个独立的网站站点,这个站点对应独立的域名(IP),具有独立的程序和资源目录,可以独立的对外提供服务。
这个独立的站点配置是在nginx.conf中使用server{}代码块标签来表示一个虚拟主机。
Nginx支持多个server{}标签,即支持多个虚拟主机站点。
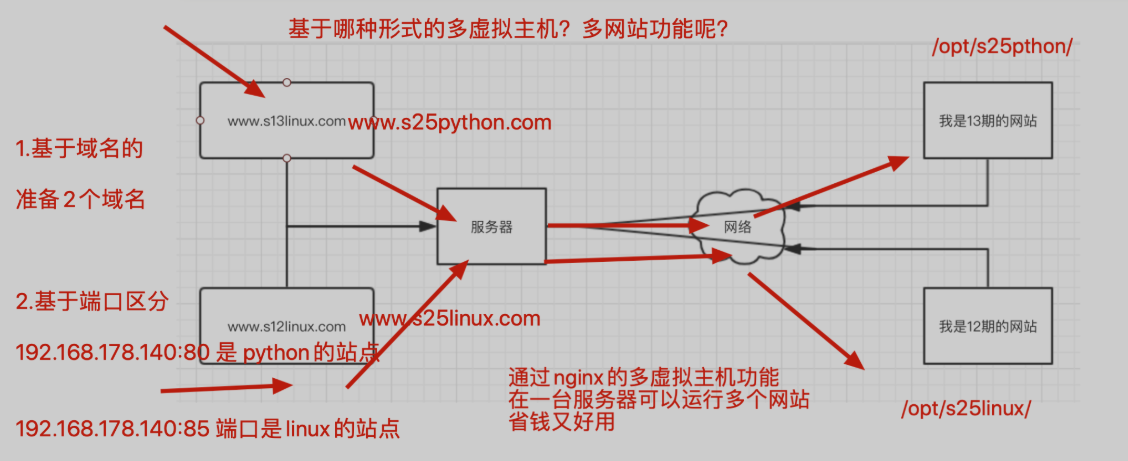
通过不同的域名区分不同的虚拟主机,是企业应用最广的虚拟主机。
修改hosts文件,强制写入域名对应关系,比较麻烦
通过不同的端口来区分不同的虚拟主机,一般用作企业内部网站,不对外直接提供服务的后台,例如www.pythonav.cn:9000
修改nginx.conf配置如下,定义2个server{} 区域块即可
[root@localhost conf]# vim nginx.conf
    #   目前这里是第一个server {} 区域块,端口是85
    server {
        # 定义该网站的端口
        listen       85;
        #填写域名,没有就默认即可
        server_name  localhost;
        #更改nginx的编码支持
        charset utf-8;
        error_page  404  /40x.html;
        #access_log  logs/host.access.log  main;
        #access_log  "pipe:rollback logs/host.access_log interval=1d baknum=7 maxsize=2G"  main;
        # nginx的域名匹配,所有的请求,都会进入到这里
        # 例如  10.0.0.129:85/lubenwei.jpg
        #    10.0.0.129:85/menggededianhua.txt
        location / {
            #这个root参数,是定义该虚拟主机,资料存放路径的,可以自由修改
            #  当用户访问  10.0.0.129:85的时候,就返回该目录的资料
            root   /s25python/;
           # index参数,用于定义nginx的首页文件名字  ,只要在/s25nginx目录下存在index.html文件即可
            index  index.html index.htm;
        }

    }
    server {
        listen       85;
        server_name  localhost;
        charset utf-8;

        error_page  404  /40x.html;

        location / {
            root   /s25python/;
            index  index.html index.htm;
        }
    }
    #这里就是上一个Server{}的标签闭合处了,,可以写入第二个server{}
    # 注意 ,注意,server{} 标签快,是平级的关系,不得嵌套,检查好你的花括号
    # 这里是第二个虚拟主机的配置了
    server  {
        listen 89;
        server_name  _;
        # nginx的域名匹配
        # 当用户访问 10.0.0.129:89的时候,返回该目录的内容
        location  / {
            root   /s25linux/;
            index  index.html;
       }
    }
    server  {
        listen 89;
        server_name  _;

        location  / {
            root   /s25linux/;
            index  index.html;
       }
    }
[root@localhost conf]#
[root@localhost conf]# mkdir /s25linux /s25python
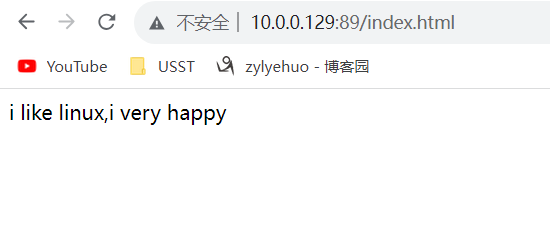
[root@localhost conf]# echo "i like linux,i very happy" > /s25linux/index.html
[root@localhost conf]# echo "i use python,i very nb" > /s25python/index.html
# 注意,改了配置文件,一定要平滑重启,否则不生效
[root@localhost conf]# nginx -s reload
# 此时分别访问2个站点,即可看到2个站点的资料
10.0.0.129:85
10.0.0.129:89

通过不同的IP区分不同的虚拟主机,此类比较少见,一般业务需要多IP的常见都会在负载均衡中绑定VIP
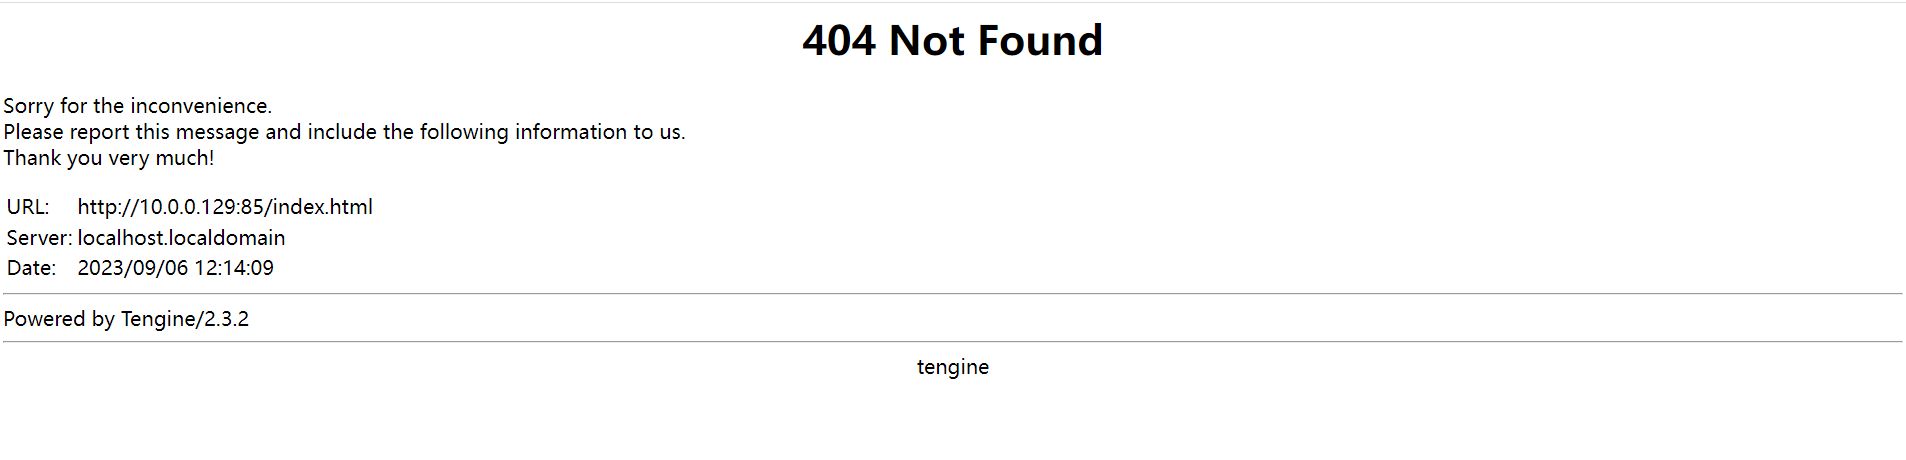
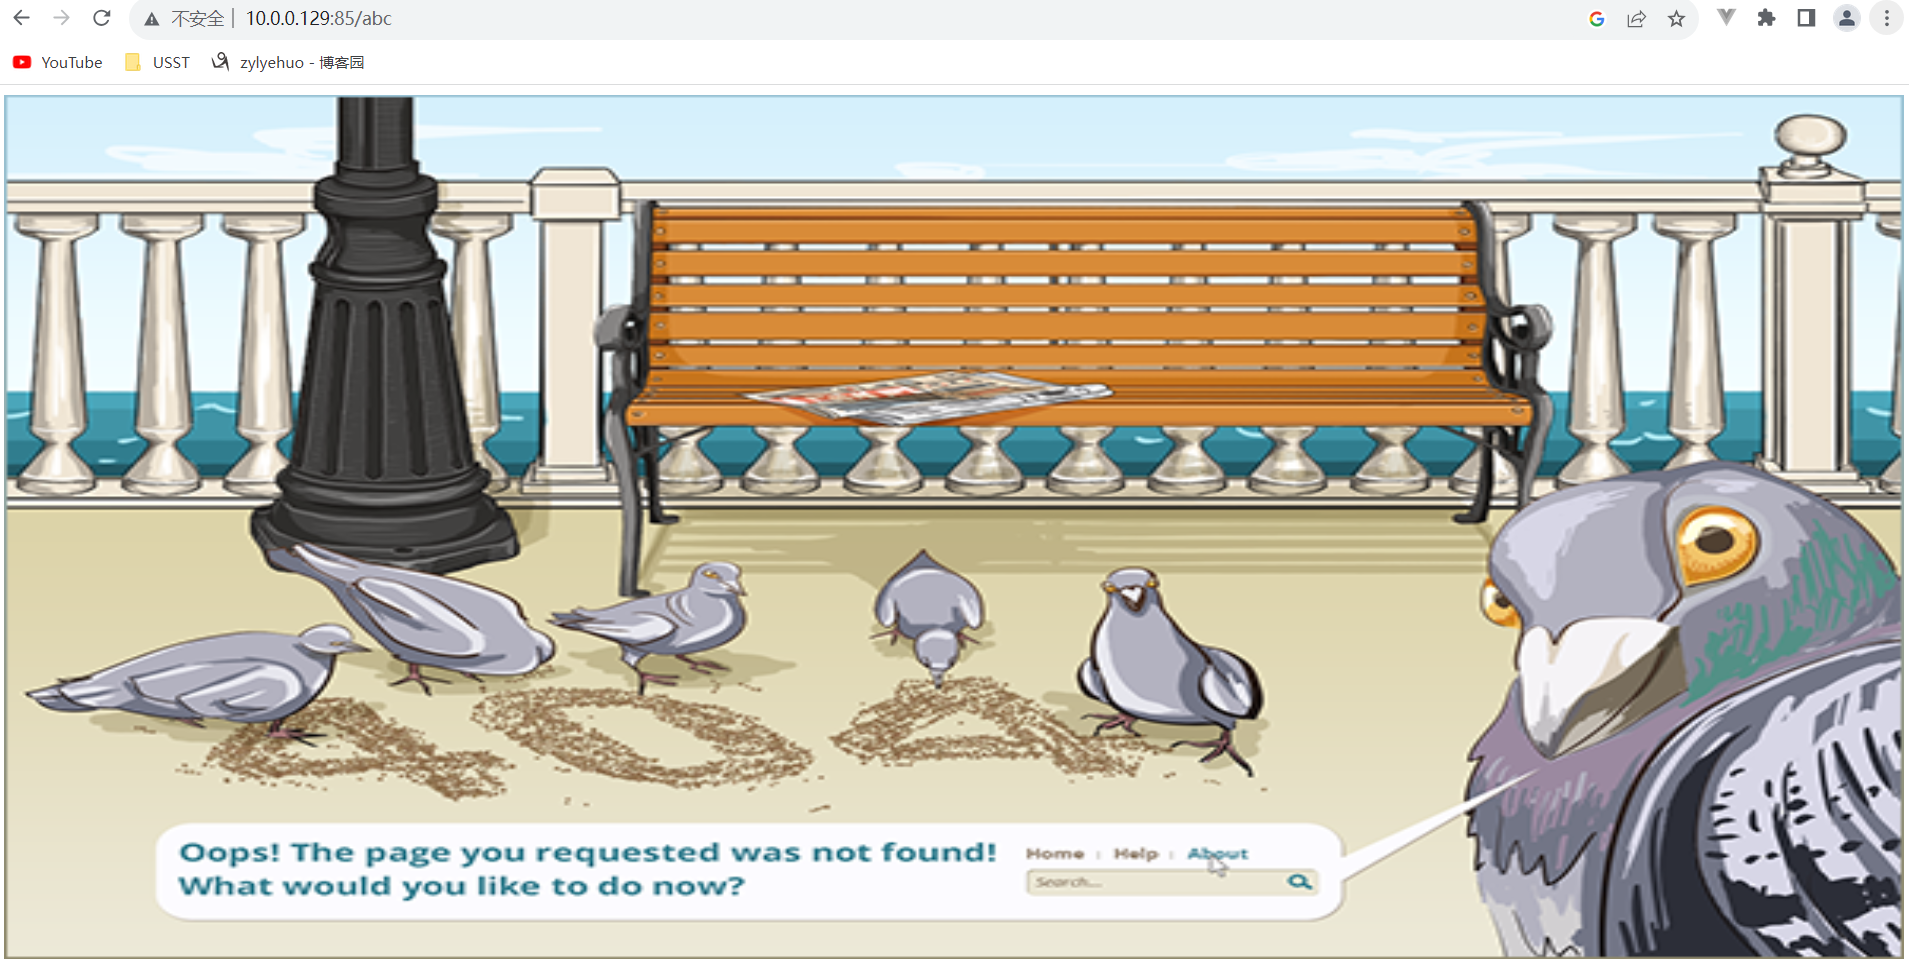
如果nginx不做404优化,那么页面是非常丑的
# 修改 nginx.conf,修改一行参数即可

server {
        # 定义该网站的端口
        listen       85;
        # 填写域名,没有就默认即可
        server_name  localhost;
        # 更改nginx的编码支持
        charset utf-8;
        # 如此添加一行参数,当用户请求出错,出现404的时候,就返回 root定义的目录去寻找40x.html文件
        # 机器的配置,就是去  /s25python/ 这个目录下 寻找 40x.html
        error_page  404  /40x.html;   #注意别忘了分号

        ......
# 手动创建一个40x.html,咱们也可以去网上搜索404的html模板,修改此40x.html即可
[root@localhost conf]# vim /s25python/40x.html

<meta charset=utf8>
<img style='width:100%;height:100%;' src=https://pic1.zhimg.com/80/v2-77a9281a2bebc7a2ea5e02577af266a8_hd.png>
# 注意还得重启nginx
[root@localhost conf]# nginx -s reload
浏览器访问不存在的网址进行测试
10.0.0.129:85/abc
日志功能对每个用户访问网站的日志信息记录到指定的日志文件里,开发运维人员可以分析用户的浏览器行为,此功能由ngx_http_log_module模块负责,官网地址是:
nginx的访客日志,能够记录,分析用户的请求行为
-什么时间点,访问的最频繁,比如路飞的网站,网站的流量,基本都在晚上,学生下了班,在线学习各种技术
-记录用户的请求频率,以此检测是否是爬虫等恶意请求,进行封禁。
-检测躲在代理ip后的真实用户ip
-检测用户ip,请求时间,请求的url内容等
修改nginx.conf,在 http{} 代码块中,打开如下注释即可
[root@localhost conf]# vim nginx.conf
    #打开此nginx的访问日志功能,即可查看日志
    log_format  main  '$remote_addr - $remote_user [$time_local] "$request" '
                      '$status $body_bytes_sent "$http_referer" '
                      '"$http_user_agent" "$http_x_forwarded_for"';

    access_log  logs/access.log  main;
$remote_addr    记录客户端ip
$remote_user    远程用户,没有就是 “-”
$time_local    对应[14/Aug/2018:18:46:52 +0800]
$request     对应请求信息"GET /favicon.ico HTTP/1.1"
$status      状态码
$body_bytes_sent  571字节 请求体的大小
$http_referer  对应“-”  由于是直接输入浏览器就是 -
$http_user_agent  客户端身份信息,以此可以nginx判断,用户客户端是手机浏览器,就转发移动端页面给与用户;如果是pc的客户端,就转发给pc页面给与用查看
$http_x_forwarded_for  记录客户端的来源真实ip 97.64.34.118,机器A用机器B的ip去访问,可以抓出机器A的地址,这个参数不是万能的,爬虫和反扒是相互的
# 注意还得重启nginx
[root@localhost conf]# nginx -s reload

# 实现实时监测访客日志的信息
[root@localhost tngx232]# tail -f /opt/tngx232/logs/access.log

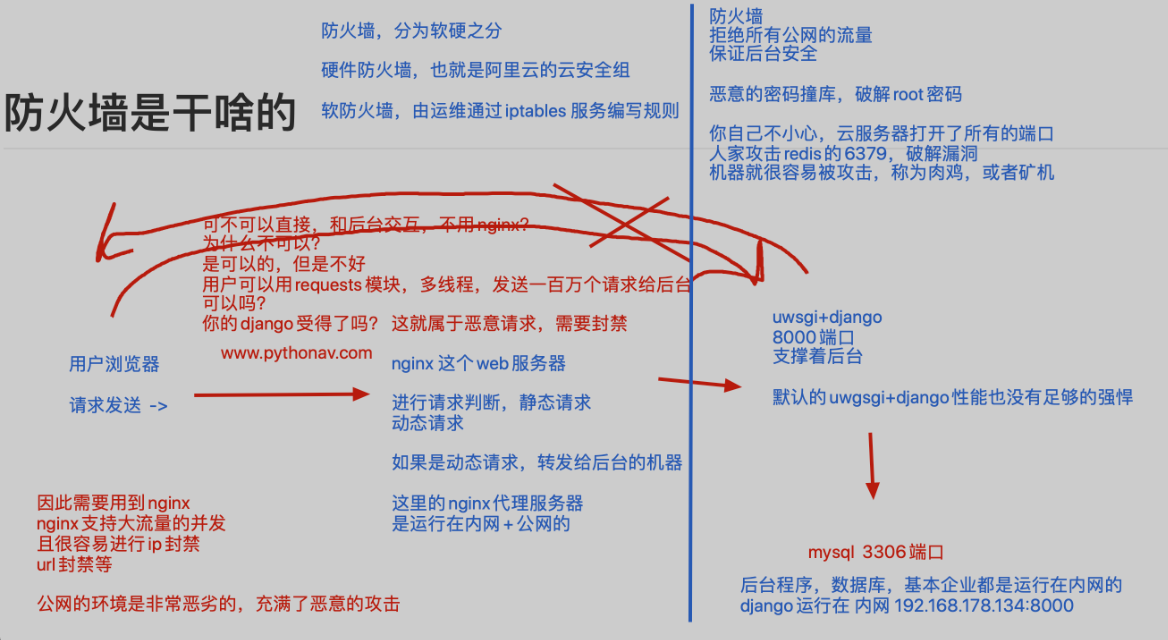
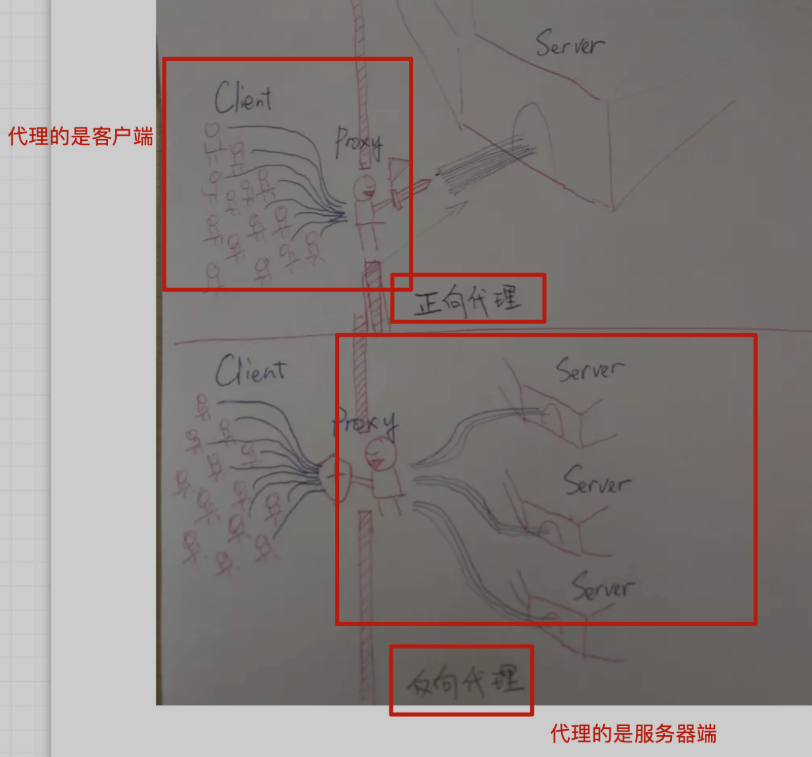
正向代理,代理服务器,代理的是客户端
反向代理,代理服务器,代理的是服务端
反向代理
反向,代理

代理是什么?你在生活中见过那些代理的事儿?
如下的几种代理情况

海外代购
我们在国内,想买的东西买不到,------>  代购 ----->  国外的产品
我们拿到东西  <-------代理(人肉拿回来,寄回来)<-------国外的产品

租房的中介
你刚来北京,要住房 ,怎么办?
找中介,支付中介费
由于房东一般很难找到,或者说不想和客户直接打交道
超哥要租房 ------->  找到中介(只是做了一个中间人,租房请求转达给了房东) ------>房东(资源属于房东)
超哥拿到房子的钥匙<------中介(拿到资源后,转发给用户)<-------房东
直接找到房东本人的
用户----> 房东
用户<---房东

买票,黄牛这个代理
超哥想过年回家买票,,直接去12306买不着
用户买票------>找黄牛----->拿到资源
用户拿票<----黄牛<------某资源

---------
在技术领域的反向代理

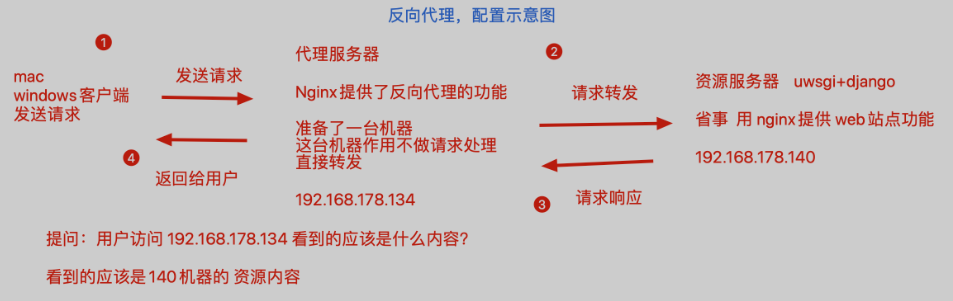

理论上,需要准备2台linux服务器
192.168.178.134
192.168.178.140

考虑到安装2个虚拟机会比较卡,因此决定用如下的方案,用到了nginx支持的多虚拟主机功能
准备1台机器即可
如10.0.0.129,基于端口的不同,运行不同的站点

准备一台linux机器,安装好nginx之后,,修改nginx.conf,添加代码如下,配置2个server{}标签
[root@localhost conf]# cd /opt/tngx232/conf

[root@localhost conf]# vim nginx.conf
    #   第一个虚拟主机的配置,作用是反向代理了

    server {
        listen       80;
        server_name  localhost;
        charset utf-8;
        error_page  404  /40x.html;
        # 这里的locaiton 路径匹配,如果你写的是root参数,就是一个web站点功能
        # 如果你写的是proxy_pass参数,就是一个请求转发,反向代理功能
        location / {
            # 当请求发送给  10.0.0.129:80的时候
            # 直接通过如下的参数,转发给90端口
            proxy_pass  http://10.0.0.129:90;
        }
    }
    server {
        listen       80;
        server_name  localhost;
        charset utf-8;
        error_page  404  /40x.html;
        location / {
            proxy_pass  http://10.0.0.129:90;
        }
    }
   #第二个虚拟主机,作用是web站点功能,资源服务器,提供页面的

   server  {
        listen 90;
        server_name  _;
        # 当请求来到10.0.0.129:90的时候,就返回/s25proxy目录下的index.html
        location  / {
            root   /s25proxy/;
            index  index.html;
       }
    }
   server  {
        listen 90;
        server_name  _;
        location  / {
            root   /s25proxy/;
            index  index.html;
       }
    }
[root@localhost conf]# mkdir /s25proxy
[root@localhost conf]# vim /s25proxy/index.html

<meta charset=utf8>

我是资源服务器,我是10.0.0.129的90端口
[root@localhost conf]# nginx -s reload
浏览器访问 10.0.0.129:80
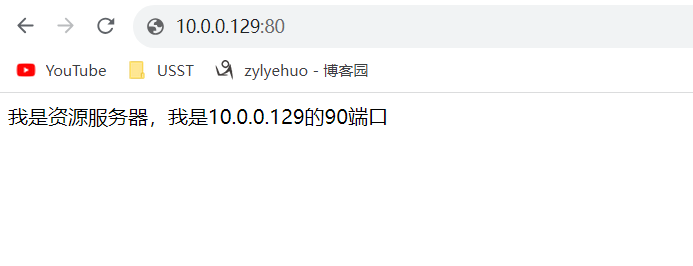
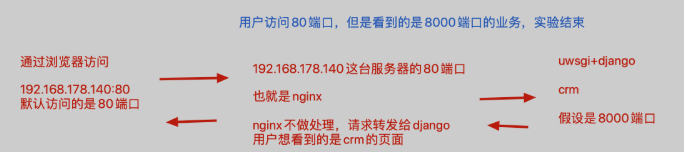
最终访问效果

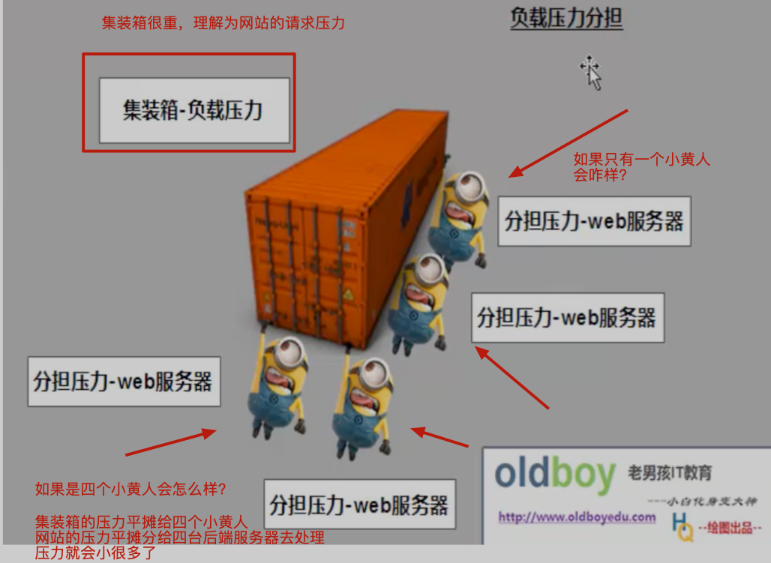
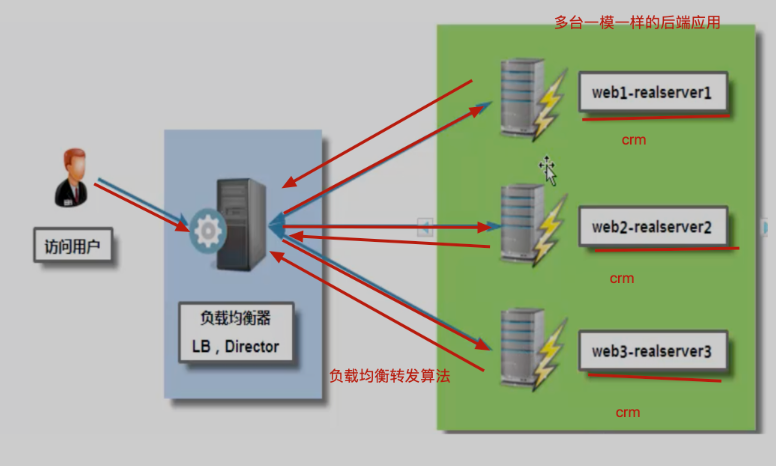
负载均衡实验原理图
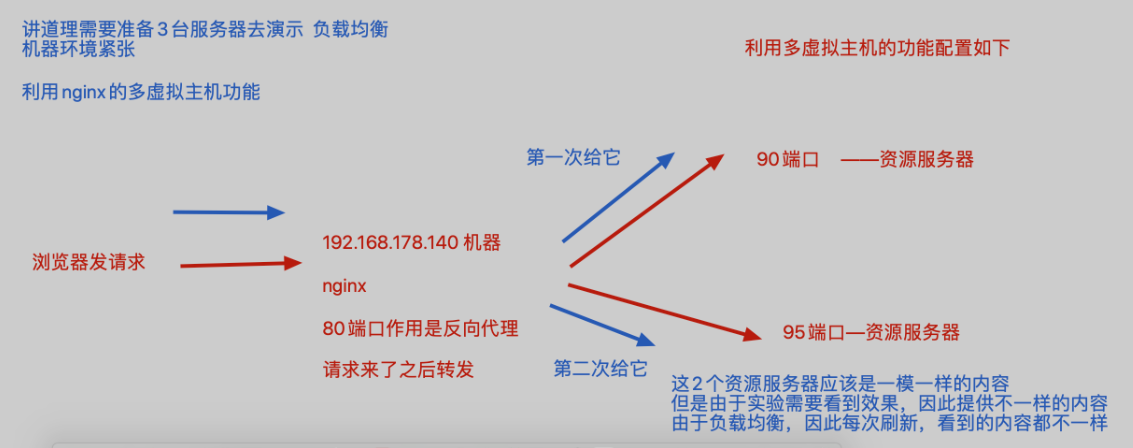
修改nginx.conf如下
[root@localhost conf]# cd /opt/tngx232/conf

[root@localhost conf]# vim nginx.conf
    # 用upstream关键词定义负载均衡池,写入资源服务器的地址
    # 负载均衡的算法,默认是轮询机制,一台服务器处理一次
    upstream  s25real_server  {
        server  10.0.0.129:90;
        server  10.0.0.129:95;
    }
    server {
        listen       80;
        server_name  localhost;
        charset utf-8;
        error_page  404  /40x.html;
        # 这里的locaiton 路径匹配,如果你写的是root参数,就是一个web站点功能
        # 如果你写的是proxy_pass参数,就是一个请求转发,反向代理功能
        location / {
            # 当请求发送给  10.0.0.129:80的时候
            # 直接通过如下的参数,转发给90端口
            proxy_pass  http://s25real_server;
        }
    }
    upstream  s25real_server  {
        server  10.0.0.129:90;
        server  10.0.0.129:95;
    }
    server {
        listen       80;
        server_name  localhost;
        charset utf-8;
        error_page  404  /40x.html;
        location / {
            proxy_pass  http://s25real_server;
        }
    }
    # 第二个虚拟主机,作用是web站点功能,资源服务器,提供页面的
    server  {
        listen 90;
        server_name  _;
        # 当请求来到   192.168.178.140:90的时候,就返回/s25proxy目录下的index.html
        location  / {
                root   /s25lol/;
                index  index.html;
        }
    }
    server  {
        listen 90;
        server_name  _;
        location  / {
                root   /s25lol/;
                index  index.html;
        }
    }
    # 第三个server{}虚拟主机,作用是提供资源服务器的内容的
    server {
        listen 95;
        server_name _;
        location   /   {
            root  /s25dnf/;
            index  index.html;
        }
    }
    server {
        listen 95;
        server_name _;
        location   /   {
            root  /s25dnf/;
            index  index.html;
        }
    }
[root@localhost conf]# nginx -t
nginx: the configuration file /opt/tngx232//conf/nginx.conf syntax is ok
nginx: configuration file /opt/tngx232//conf/nginx.conf test is successful
[root@localhost conf]# nginx -s reload
[root@localhost conf]# mkdir /s25lol /s25dnf
[root@localhost conf]# echo "lol" >> /s25lol/index.html
[root@localhost conf]# echo "dnf" >> /s25dnf/index.html


# 1.默认是轮询机制,每台服务器处理一次

# 2.加权轮询,修改nginx.conf如下,给与机器不同的权重
    upstream  s25real_server  {
        server  10.0.0.129:90 weight=4;
        server  10.0.0.129:95 weight=1;
    }